
Rob Joyce, a Senior Advisor to the National Security Agency (NSA) announced the public release of a software reverse engineering framework known as GHIDRA at RSA Conference 2019, San Fransisco. Like many other cybersecurity enthusiasts I was very much excited for Ghidra.
Ghidra is being used by the NSA over a decade to reverse engineer software to help analyze malicious code and malware and can give cybersecurity professionals a better understanding of potential vulnerabilities in their network and systems. Ghidra runs on the major OS (Windows, MacOS, and Linux).
Not to be forgotten NSA has been victimized by theft and hacks of thier security tools in the recent years and also this tool was listed on the Vault7 leak disclosure by WikiLeaks in 2017.

This tool is written in Java and quite a few people already started comparing this with high end commercial reverse engineering tools like IDA. It may be too quick to judge but since its open source, we need to wait and watch what open source community can come up with! But honestly, Ghidra’s extensibility is jaw-dropping. And I loved the detailed documentation. You won’t have a hard time getting started with Ghidra 😉
If you are interested in contributing to Ghidra or maybe like to see the source code, here is the link to Ghidra on Github: https://github.com/NationalSecurityAgency/ghidra
Disclaimer: I am not an Expert at Reverse Engineering. I haven’t done anything advanced here! I just wanted to give it a try for Ghidra! So if you are looking to read about advanced features Ghidra offers, or maybe advanced Reverse Engineering, I am sorry this is not the article you are looking for! This is more or less like a getting started with article.
Reverse Engineering

I quote this from Wired Magazine:
“Reverse engineering is a crucial process for malware threat intelligence researchers working backward from malware being used to carry out attacks — to understand how it works, what its capabilities are, and who wrote it or where it came from.
Reverse engineering is also an important way for defenders to check their own code for weaknesses and confirm that it works as intended.”
https://www.wired.com/story/nsa-ghidra-open-source-tool/
Installation
Ghidra’s installation is pretty much easy and very straight forward. Ghidra’s Installation Guide has everything you need to install Ghidra on your machine.
Once you install Ghidra, this is how it looks!

You might want to download and install JDK 11 for Ghidra to run if it’s not installed on your machine.
Here is the download link to JDK 11: https://www.oracle.com/technetwork/java/javase/downloads/jdk11-downloads-5066655.html
WannaCry
In May 2017, a ransomware worm quickly spread across a number of computers targeting computers running the Microsoft Windows Operating System by encrypting data and demanding a ransom payment in the form of Bitcoin. While the attack was stopped within a few days after the discovery of killswitch, it is reported that almost 200,000 computers were affected across 150 countries and the total damage ranging from millions to billions of Dollars.
WannaCry once gets installed on your windows machine, it encrypts the file on PC’s hard drive, making them almost impossible for users to access, it then demands a ransom to be paid using bitcoins.
In this article, I will try to find the KillSwitch for WannaCry ransomware. I will show you how the infamous killswitch was integrated into WannaCry. Let’s get started! 😉
Installing the WannaCry
Wait, what? 😠 Am I going to install WannaCry on my machine?
Yes, you read it right 😉
Is this step required to reverse engineer WannaCry?
Absolutely Not 😄
Please remember to this at your own risk and be extremely careful to not run it on any important machines. If you really want to install and see how it works, make sure that you install it on your virtual machine.
Here is the link to download the WannaCry.
Make sure to turn off the Windows Defender before you install WannaCry and download an outdated Windows 10 VM.
Once you run the WannaCry.exe, this is how you will be welcomed with the infamous WannaCry screen.
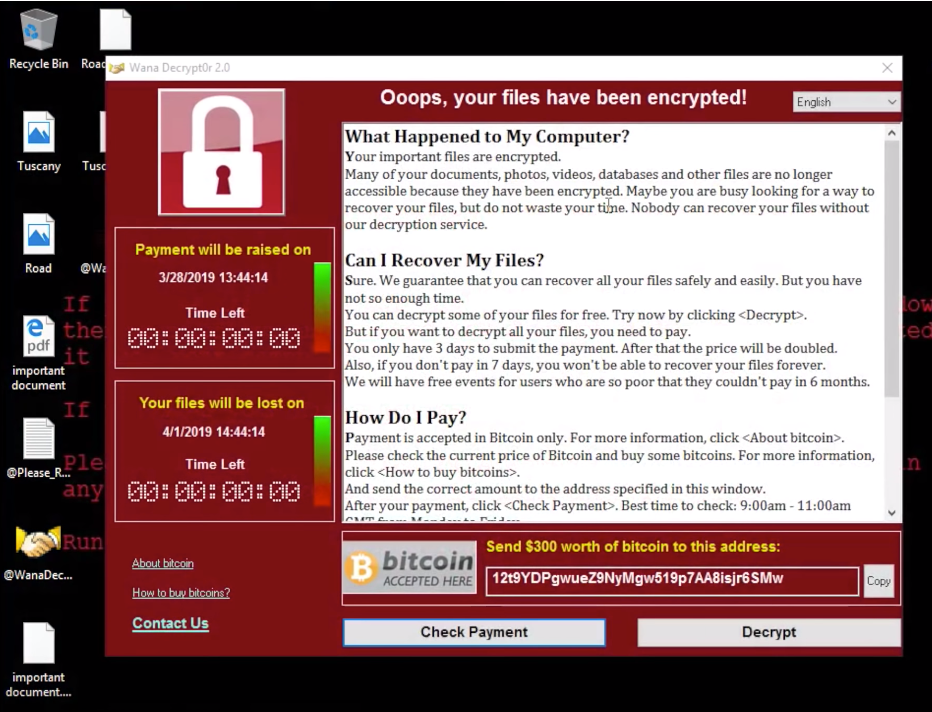
At this moment, we cannot access any of the files that we have on the machine.
Let’s load WannaCry executable into Ghidra and see what’s inside 😉
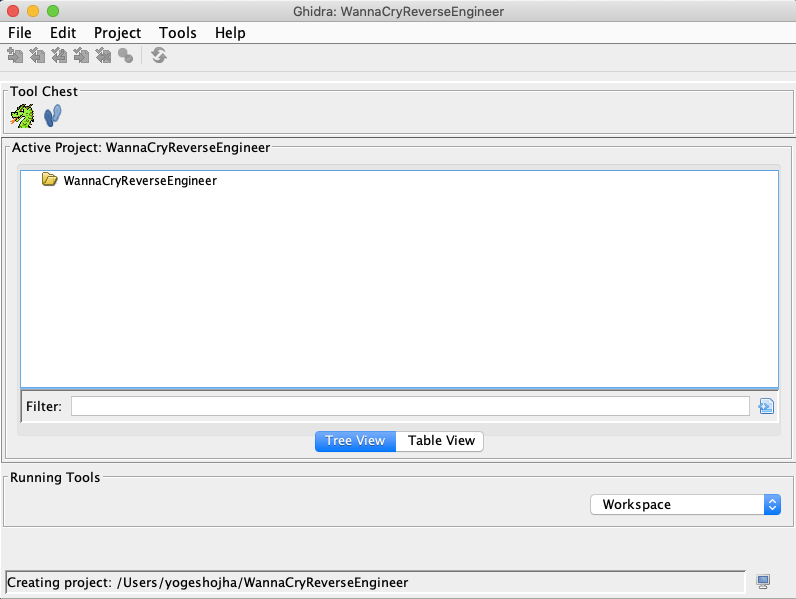
Download WannaCry zip file from the link above, and extract it. Open Ghidra and create a new project, name it as you wish.
Once done with this, simply drag and drop the executable on this screen.
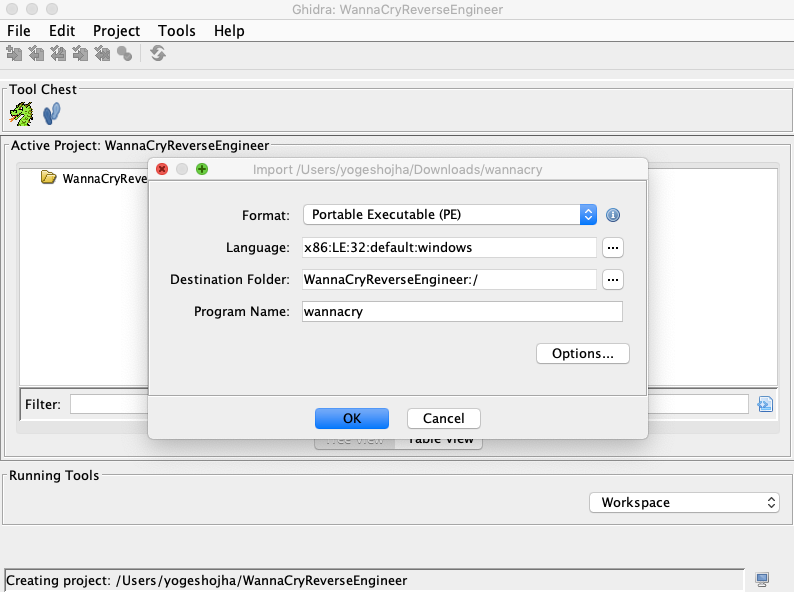
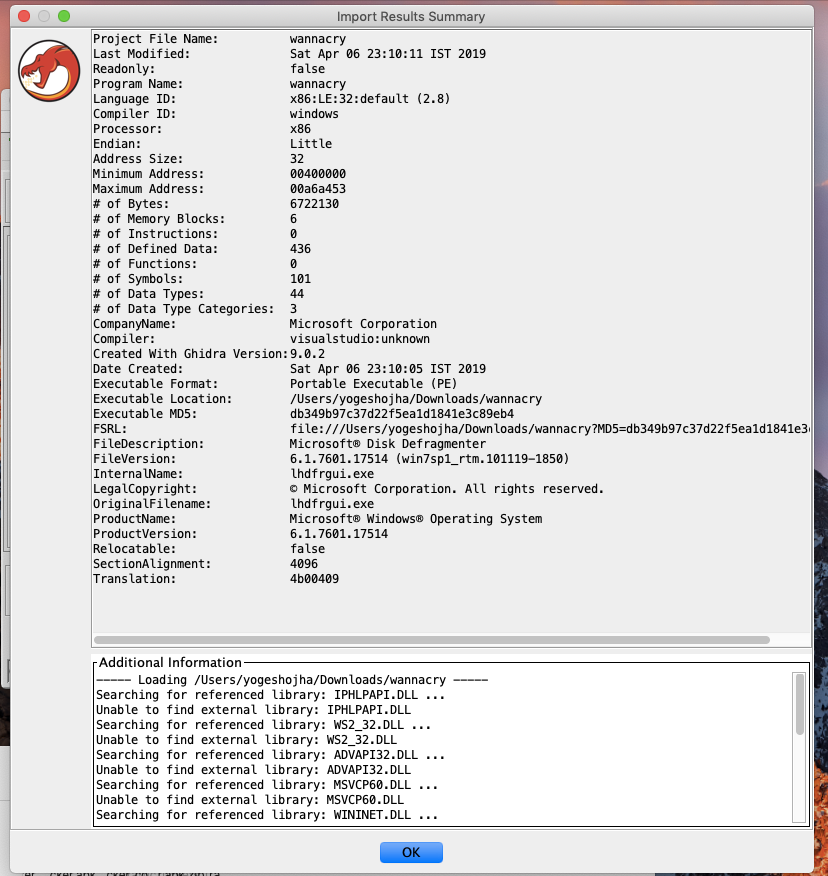
Once you click “Ok”, your executable will be imported and you will be welcomed with more information about the binary executable.
After this double click on WannaCry to open in code browser. The code browser looks convenient though. On the left, you get to see the disassembly view and on the right, you get to see the decompile view.
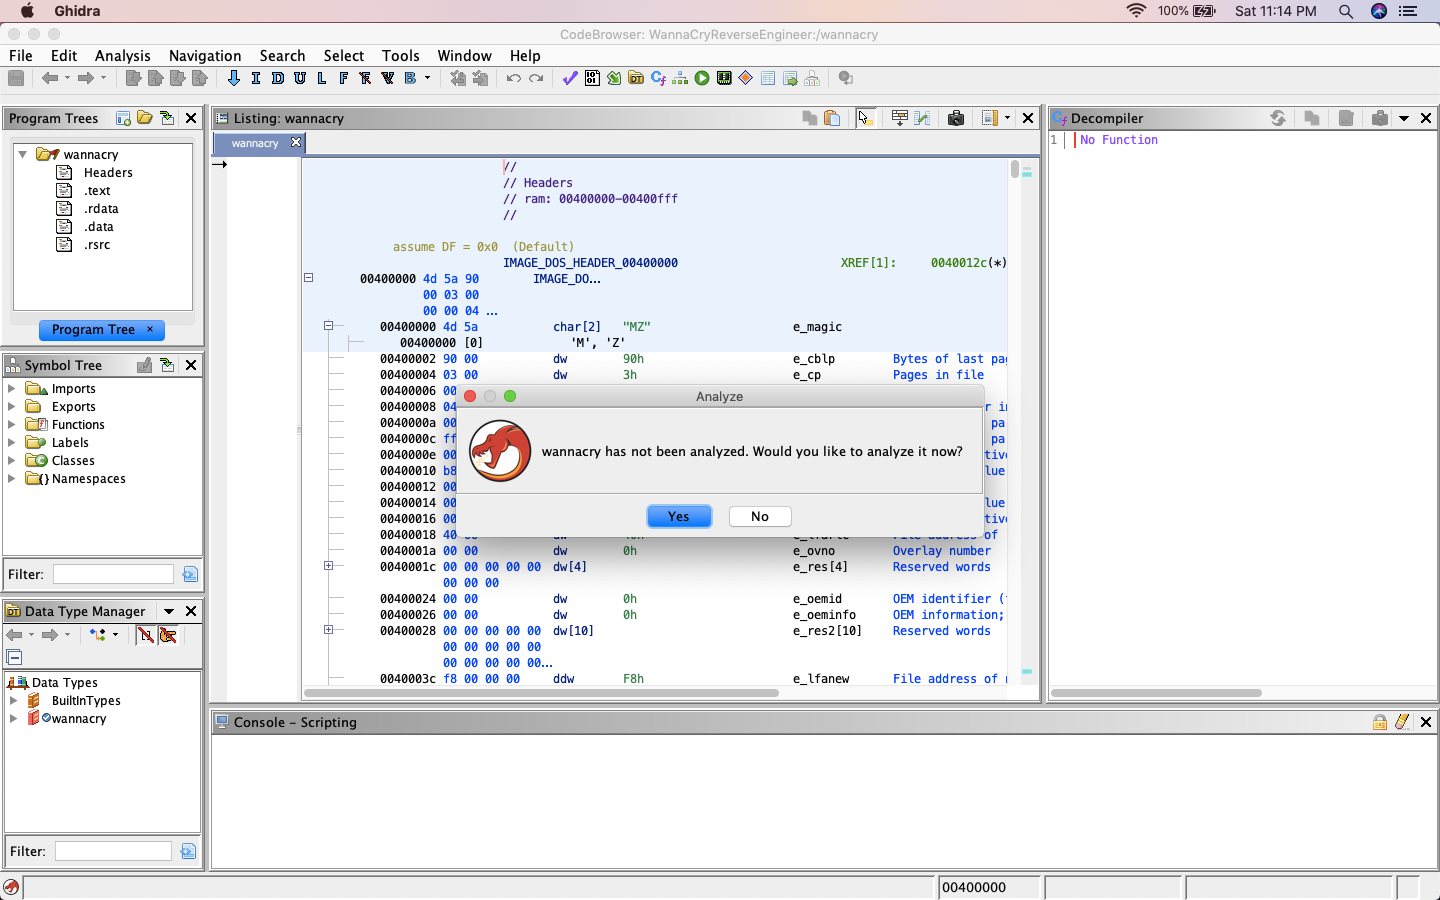
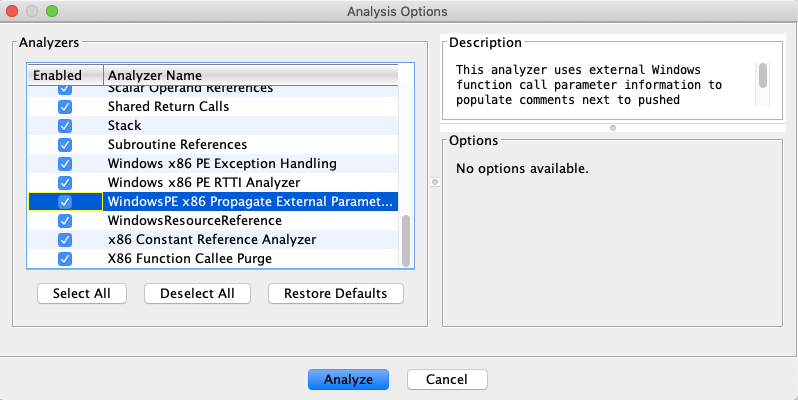
Start with analyzing the executable and you might have to check/enable few options, Decompiler Parameter ID and WindowsPE x86 Propagate External Parameter option as the additional analyzer.
Once done, hit analyze and ignore warnings if any. This is how the Ghidra looks after analyzing.
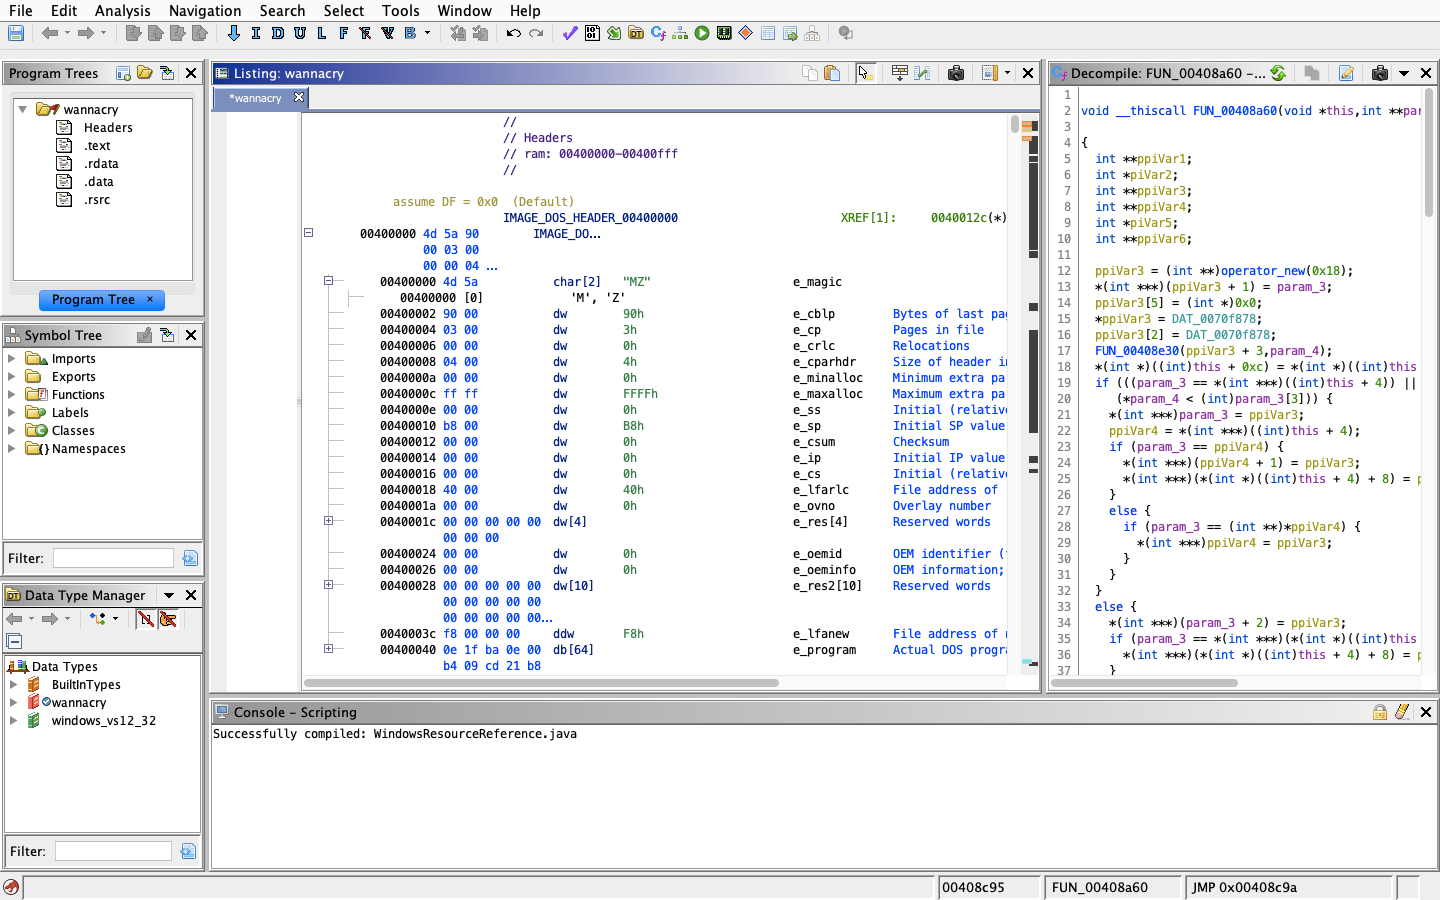
Once done, we can start digging into the binary and look for the main function or the main entry function.
We don’t see any main() function or WinMain() function. But I see a function with label entry. Let’s see what’s inside the function with label entry, which is, of course, the function first called when executable is launched. This is the default entry code generated for windows executables.
WinMain() is the C entry point function of any windows application. Like normal DOS/console based application which has main() function as C entry point, in windows we have WinMain() instead. WinMain() is a function which is called by system during creation of a process.
If you have never heard of WinMain() functions here is a nice article on WinMain() function and how it works. http://www.equestionanswers.com/vcpp/winmain-application-entry.php
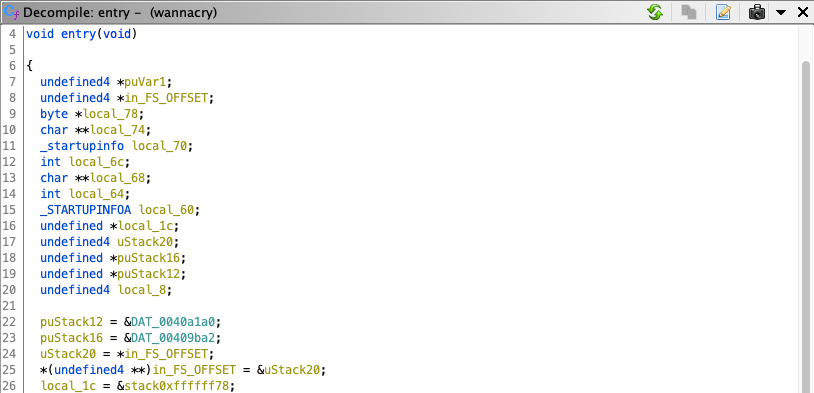
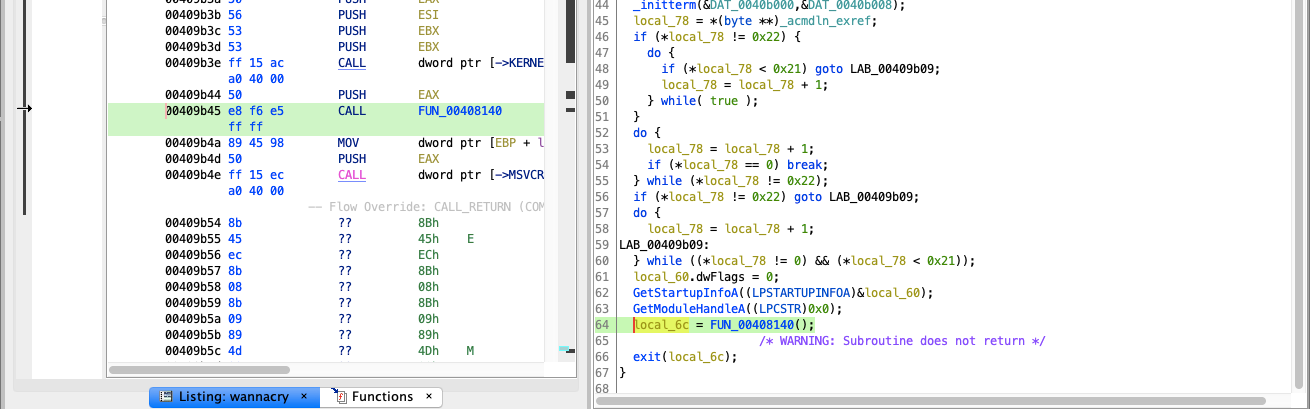
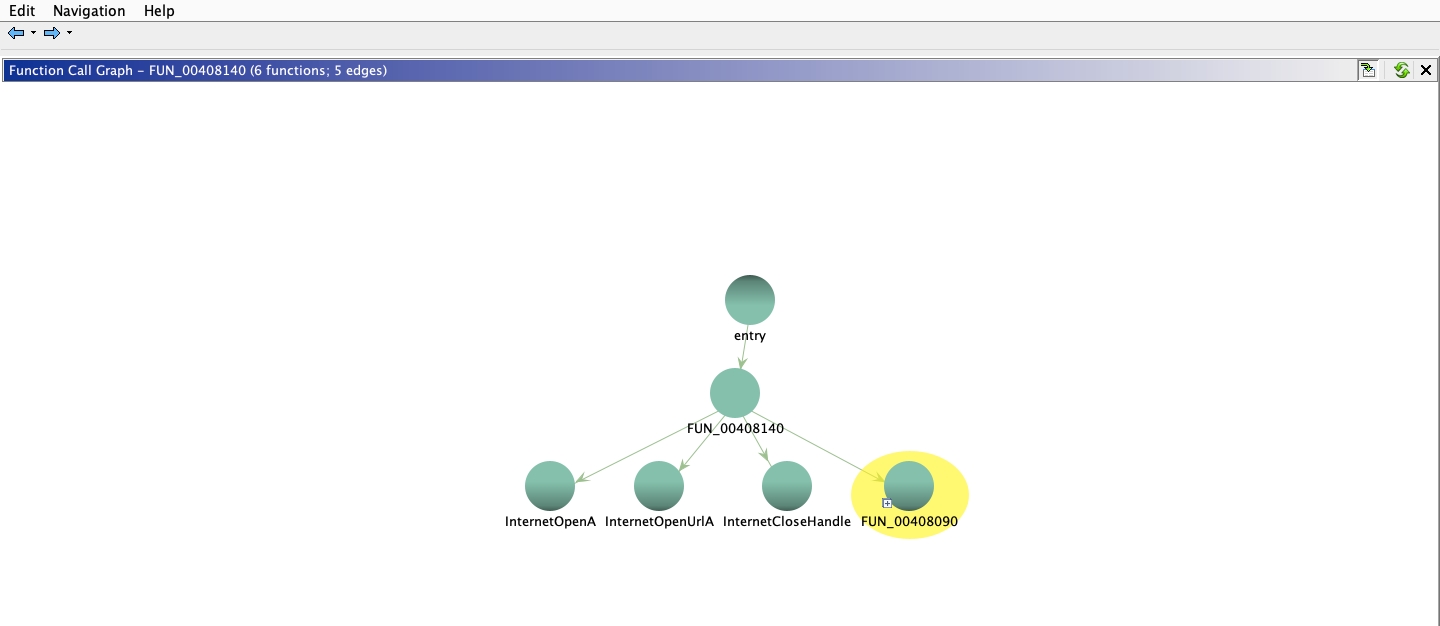
If you notice carefully, there at the bottom of this file, there’s a call to another function (Line 64).
If I open the same in Function Call Graph, here is what the call from entry function looks like
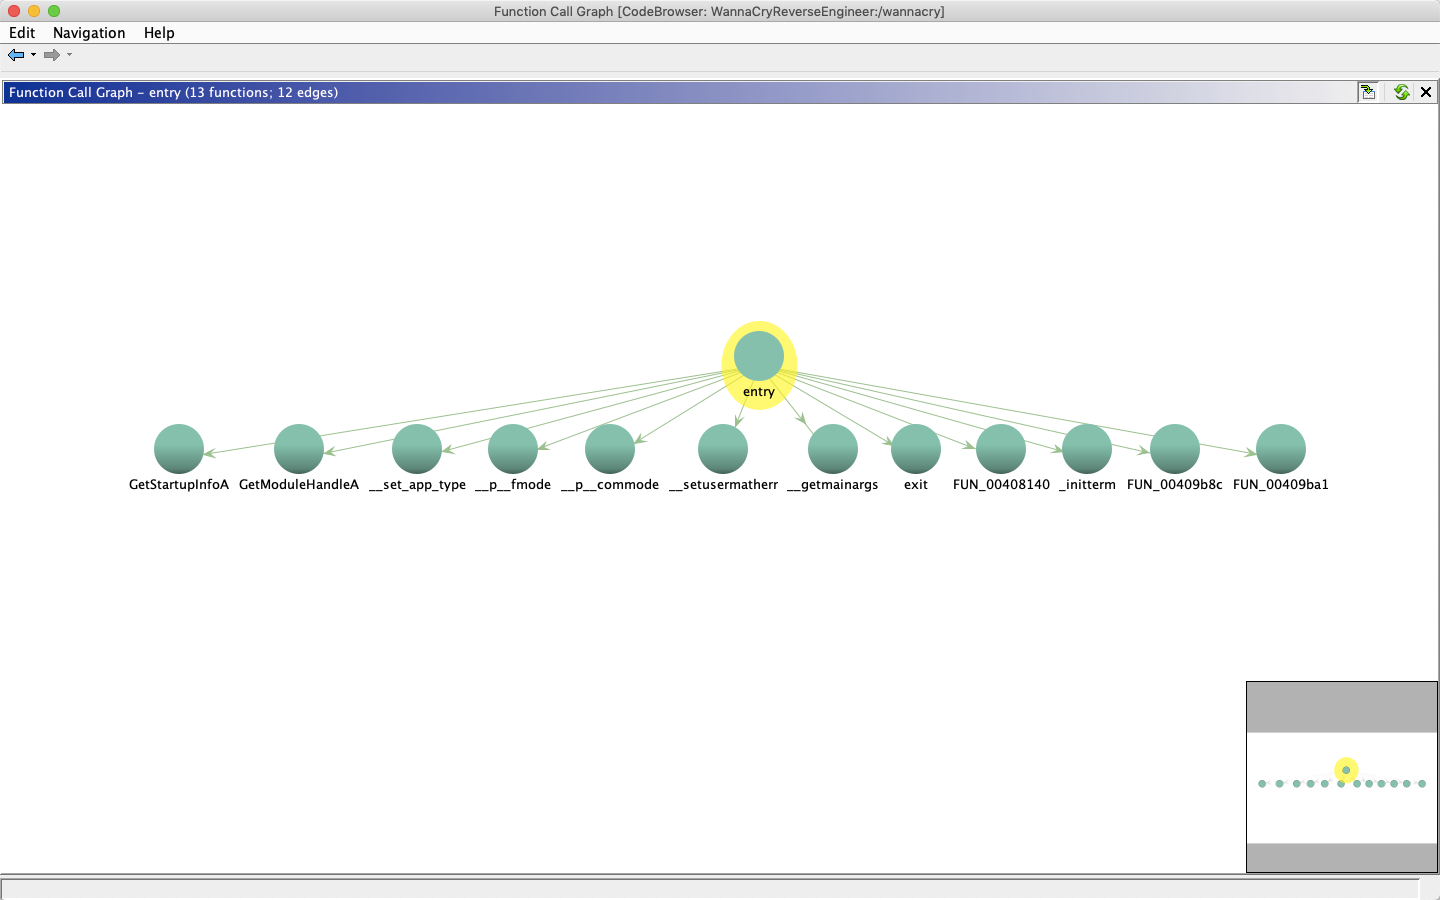
The function Call graph tool is really cool and convenient to see which function calls are being called from a particular function. I checked all the functions and really didn’t find anything useful except for the function FUN_00408140.
Checking the function call graph for FUN_00408140 reveals the other functions its calling.
I renamed the function FUN_00408140() to something_interesting().
Once you open the function something_interesting(), one can see the strange string.
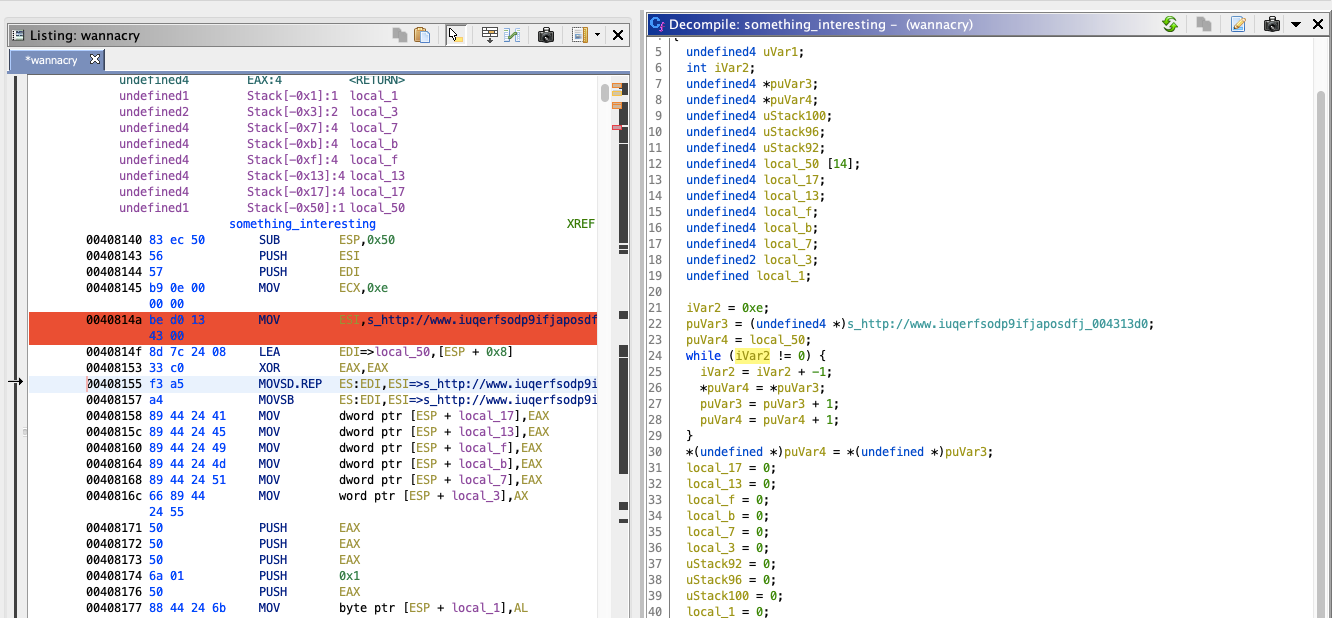
It’s this string I am talking about “s_http://www.iuqerfsodp9ifjaposdfj_004313d0”
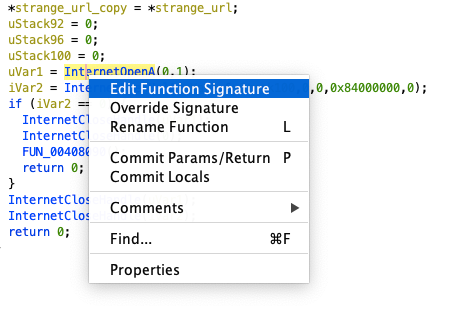
From the function call graph, it makes clear that it’s making a call to two functions InternetOpenA() and InternetOpenUrlA(). Let’s see what these two functions do.
Microsoft’s documentation says that
InternetOpenA() function is used to initialize the application’s use of the WinINet functions!
And InternetOpenUrlA() function is used for opening a resource specified by a complete FTP or HTTP URL. Which makes sense! 🤔
Make sure to check out Microsoft’s documentation for InternetOpenA()and InternetOpenUrlA().
Let’s change the function signature for both of these functions.
Now, we change the function signature for InternetOpenUrlA(), we get the error saying “Cannot Resolve the datatype HINTERNET”, it’s because this returns the type HINTERNET which is nothing but a void pointer.
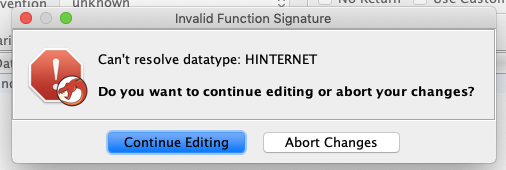
Now I create the new typedef called HINTERNET.
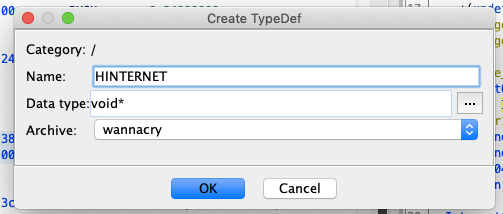
Now you are good to change the function signature.
Once we change the function signature, this is how the decompiled code looks like.
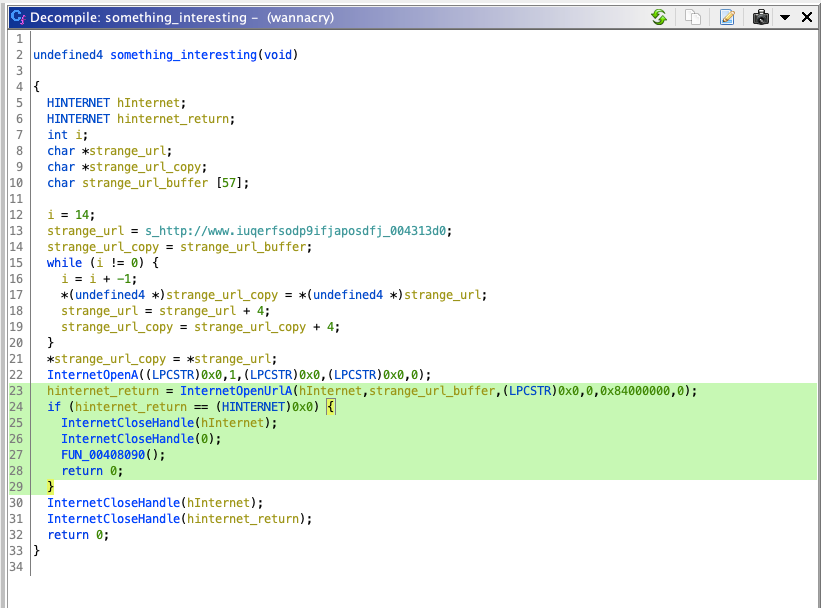
Looking at line 23 this makes it obvious that it’s making a request to the strange URL we saw earlier! Line number 24 hints us that, if the request fails, it returns the null handle and then it closes the handle and calls the function FUN_00408090(). This is where all the exciting things are happening. Let me rename that to real_things_happens_here().
If the request doesn’t fail, it simply closes the handle and quits the program. (Line 30–32)😉
Now, if you are wondering, what is this URL, this is the infamous killswitch. This was initially discovered by a hacker Marcus Hutchins aka MalwareTech. He worked on to reverse Engineer the WannaCry and discovered that the ransomware checks for the above URL. Once he registered the domain for himself, it turned out that WannaCry was shut down. It so happened that the domain was unregistered and inactive. Once the ransomware checked the URL and found that it was active, the ransomware was shut down.
This is how basically how it worked!

Further Reading
If you are interested in further reading about WannaCry, here is the article from malware tech himself:
How to Accidentally Stop a Global Cyber Attacks
Also,
Ghidra: A quick overview for the curious
And,
Conclusion
After playing with Ghidra for a couple of days, I found it very useful and has a lot of potentials.
The code has been already released and also open source community has already started fixing the bugs and issues. Let’s see what open source community can come up with so that we finally start comparing with commercial tools like IDA Pro.
Thanks for reading, hopefully, you’ve learned something new!
This article was originally published on Medium: https://medium.com/@yogeshojha/reverse-engineering-wannacry-ransomware-using-ghidra-finding-the-killswitch-a212807e9354